Process
Here, we write the process of every step during the progress of our Exhibition.
Essential agreements
1. Delegate work equally.
2. Share ideas.
3. Organise yourself.
4. Manage time properly.
5. Note down everything you have done.
6. Solve problems.
7. Work together and try your best.
2. Share ideas.
3. Organise yourself.
4. Manage time properly.
5. Note down everything you have done.
6. Solve problems.
7. Work together and try your best.
Approaches to Learning |
IB Learner Profiles |
PYP Attitudes |
|
Thinking Skills
Social Skills Communication Skills Self-management Skills Research Skills |
Thinker
Communicator Principled Balanced Risk-taker Caring Open-minded Inquirer Knowledgeable Reflective |
Appreciation
Confidence Creativity Empathy Independence Respect Commitment Cooperation Curiosity Enthusiasm Integrity Tolerance |
|
Central Idea:
1. Brainstorming: We all came up with our own central ideas. 2. Main idea: We compromised our ideas together and came up with our central idea. 3. Paraphrasing: We paraphrased it in order to be a bit better. We fixed errors, such as grammar. 4. Final Presentation: We got a second opinion about it. We did this when our PYP coordinator helped us with the process. 5. Checking: We double checked our central idea with a teacher. The same thing as number 4 but a bit different. |
Lines of Inquiry:
1. Brainstorming: Thinking of questions about animation. 2. Topic: Choosing the three of our best questions and putting them in categories according to our Key Concepts. Key Concepts: - Causation - Form - Perspective - Responsibility - Reflection - Function - Change - Connection 3. Checking: We double checked our lines of inquiry with a teacher to make sure it's appropriate for us and our topic. |
Animation:
1. Objective:
"We need to have an objective. Ask yourself: "What do I want as a result?" Digital 3D animation is something like the movie "Zootopia". Digital 2D animations are like the movies "Lion King" & "Mulan". Then, choose which one you would like to do. You need a goal, an objective. If your objective is to make an animation about deforestation, you must have a storyline, a plot. Break your topic down and show awareness and how dangerous it is. You must create a scenario or a script. You need characters as well. With these, you must showcase the effects of deforestation. However, with all of these, remember your objective at all times."
2. Scenario:
Story board is needed before you make the scenario or script to make sure you know what your writing about and the different scenes & background.
3. Character building:
Next, we draw the background, scenes and characters for the animation. This part is a little bit tricky because of the different details, parts and movement in the picture. Draw the front, sides and back of your character so you have something to refer to when your drawing from different point of views.
4. Color:
From the previous drawings, we have coloured them in.
5. Result:
Put the storyboards together to create an animation. Some of the applications you can use Microsoft paint and Adobe flash. In this case, we used the application Microsoft paint. Certain people need certain skills to make these. Some might be screen writers, some might be animators and so on.
|
Conclusion:
What did we do to create our conclusion? We brainstormed ideas and our opinions on what we learnt. We reflected on what we thought about animation before we even did research or work on the blog and also after we researched. It was hard at first - Reflection page, entry May 9 2016 - and now, we finally came up with one. - Reflection page, entry May 11 2016 - What's our conclusion? "Different types of art forms can be used to create animation and has been a part of our lives that can be used to communicate messages." |
Presentation: What are we going to do with our presentation? What can we do to get to our final presentation? When we talked with our teacher, she told us to brainstorm ideas and suggest an ideas to each other. We came up with a variety of different ideas and it was a bit hectic. But we all came up with good ideas. |
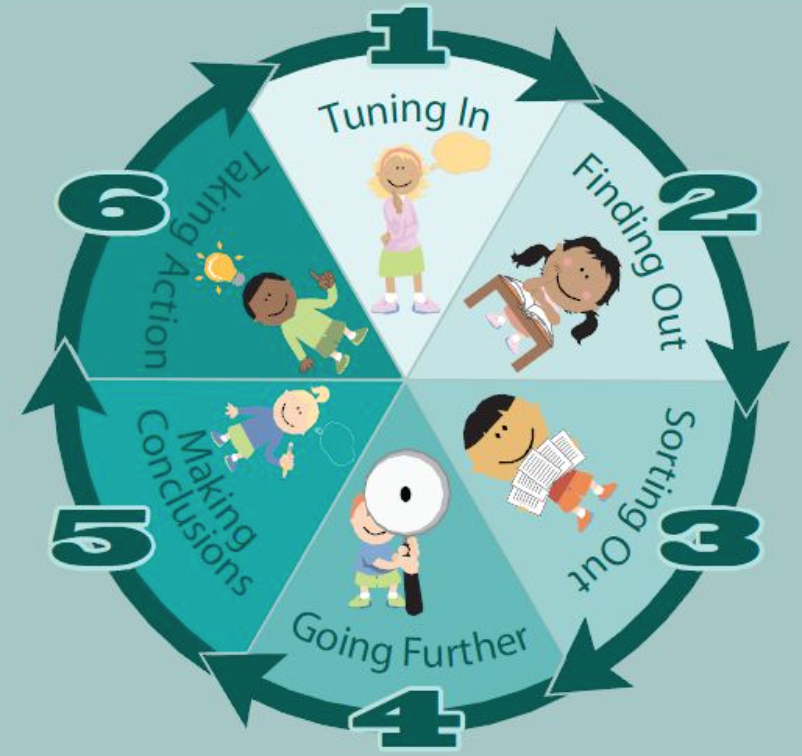
Inquiry cycle:
1. Tuning in: - Reflecting on the topic. Ask yourself: "Why did you choose animation?" - What issue are you addressing? 2. Deciding directions: - Identifying Key concepts - Coming up with the Central Idea - Coming up with our Lines of Inquiry - Coming up with questions to guide our research 3. Organising yourself: - Coming up with a plan - Timeline - Delegation list and delegate work equally 4. Finding out: - Interviewing Mr. Rilo - Survey - Mentors - Watching movies - Internet resource - Book resource - Field trip to Infiniti Reka Solusi company 5. Sorting out: - Connecting - Comparisons - Summaries - Similarities - Survey results 6. Action: - Collecting recycled paper - Asking people to draw their thoughts about planting and the beauty of nature - Working on our animation, using the drawings made by the community. - Planting some flowers in the school's MYP Library. |
